We are all aware of the need to keep our operating systems running in optimum shape. With new updates and features rolling in continuously, it can be a huge disappointment to see your PC lagging and slowing down. After the rollout of the Windows 11 version, you might have been bombarded with ads for registry cleaners that magically speed up your Windows 10 PC in a few seconds. These registry cleaners do not serve any purpose other than infecting your device with malware. If you think your Windows 10 system has slowed down, then you might have to perform some steps to get back its real speed and boost its performance.
Here in this article, we will take a look at how you can authentically boost the system performance of your slow Windows 10 PC by employing these methods. There are numerous ways available out there to boost a Windows system device but we have mentioned only the best and working ways in this post. Remember that it is good to use third-party cleaner and booster apps but you must do manual actions first before using such tools. You can also play with Windows settings to see if it makes any changes. Keeping your device clean is just a simple and working way to never lose its performance.
- Also Read About: How To Update Minecraft Windows 10
How To Boost Windows 10 Performance and Speed [11 Methods]
1. Scan Your Device For Any Threats
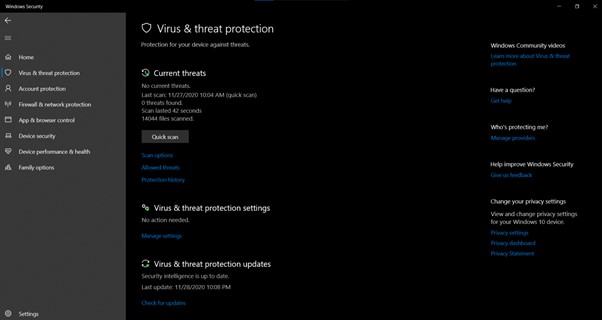
You should always have an antivirus installed onto your device to save your data in case any virus infects your computer. Go to the Virus and Threat Protection section under the System Settings tab and run a quick scan. If any malware is detected, you must erase it using the appropriate actions requires. This will be clearly displayed by the software. It is important to note that these viruses can severely affect the speed of your PC and compromise its performance. To do a full system scan, you will need to use Windows Defender or install another antivirus application.
2. Uninstall Unnecessary Apps That You Do Not Use
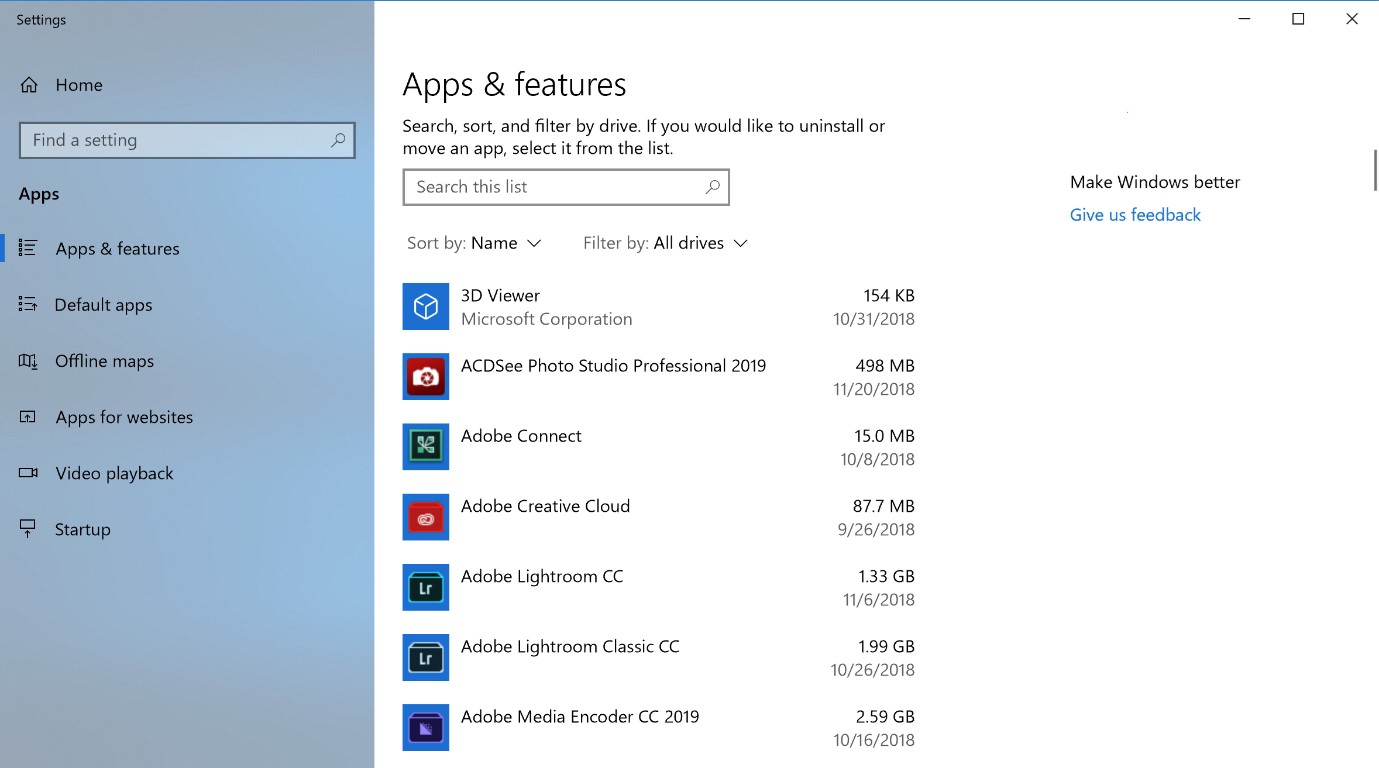
Any new Microsoft device comes with a slew of preinstalled software installed by the manufacturing company. To do away with some of these apps that may be hampering the speed of your PC, you can right-click on the unwanted app tile in the Start bar and click on the option to Uninstall. You can also sort through Size and get rid of large apps taking up a lot of space on your drive. Other options include sorting by Date Installed, Recent, or Name. This method is particularly useful as many programs load processes at boot time and takes up valuable RAM and CPU cycles. Removing these apps can immediately speed up your Windows 10 PC.
3. Alter Your Device’s Power Settings
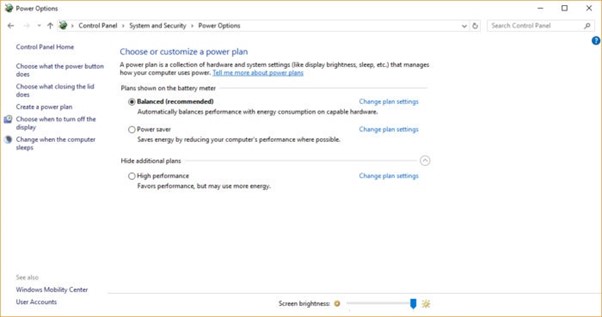
You might have opted to use Windows 10’s Power Saver plan to cut down on battery usage. If you are using this mode, you are directly responsible for slowing down your PC. The Power Saver mode reduces your PC’s performance in order to save energy. Switching to other modes like High-Performance or Balanced will give your PC an instantaneous speed boost. However, remember that this will significantly decrease your battery life.
- To switch modes, launch the Control Panel app.
- Ten select Hardware and Sound.
- After you have done this, click on Power Options.
If you want to boost your device’s performance without majorly affecting your battery life, select the Balanced option. You can opt for the High-Performance option when you have plugged your device into a power source.
4. Clean Up Space On Your Hard Disk
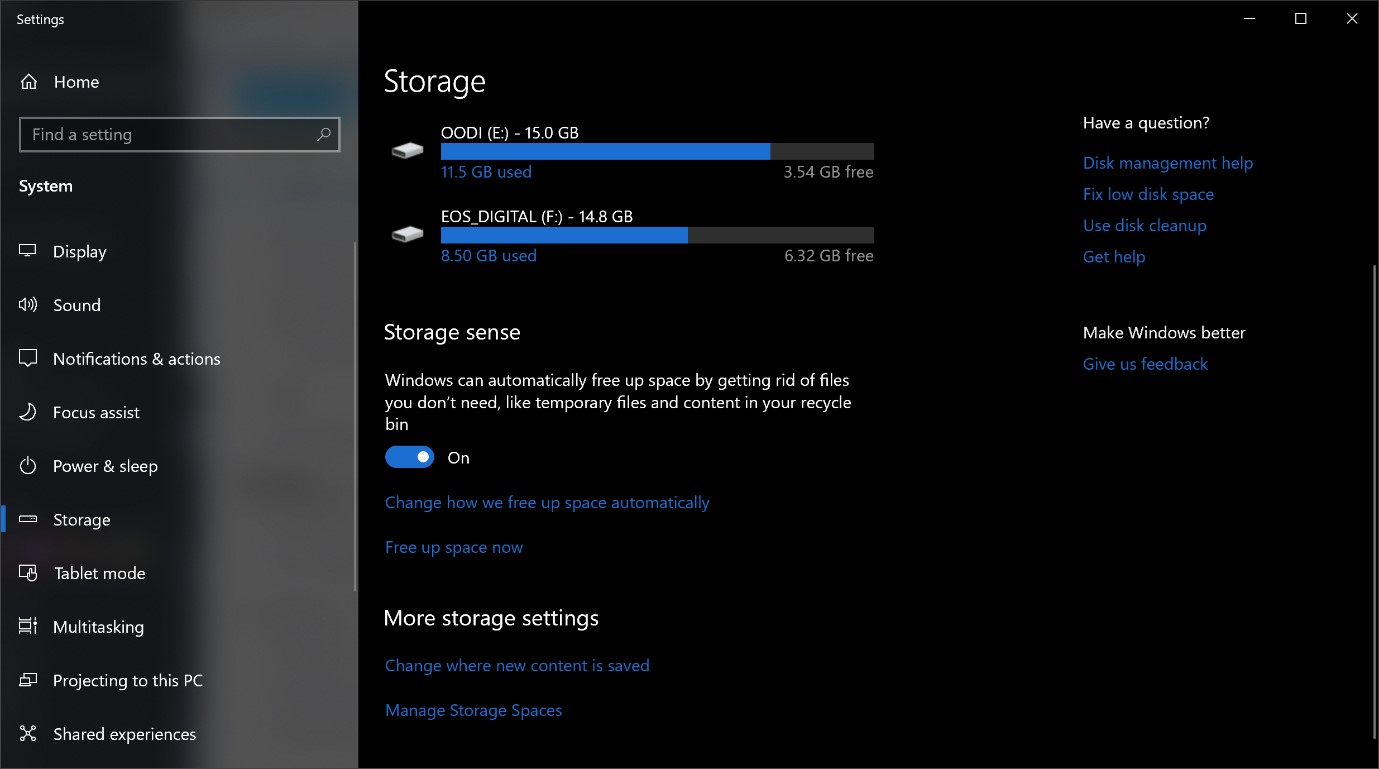
On Windows 10, you can simply select Disk Cleanup from the Start menu. This feature is dedicated to finding and cleaning up junk such as residue files that are left behind on your device. Deleting these files will save you a lot of storage space. To avoid having to remove storage-hogging junk manually, have disk defragmentation scheduled regularly. A more efficient way to optimize your storage and boost your PC’s performance is by enabling the Storage Sense option. You will also find this option under the Storage tab as it aims to free up space by getting rid of temporary files and Recycle Bin items.
- Also Read About: How To Check Your Windows Graphics Card
5. Disable Programs That Run During Start-up
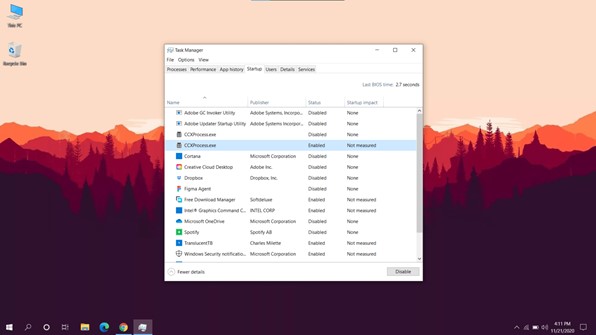
As soon as you boot up your Windows 10 PC, a number of programs start running on start-up. Most of these programs run in the background and contribute to slowing down your PC. To stop these background programs, you need to follow the steps outlined.
- Open up Task Manager from the Taskbar.
- Click on the More Details option if you are not using the Advanced Mode.
- A list of programs running in the background will now be made visible to you.
- Select on the Startup Tab to see the programs that start running as soon as you boot your PC.
- Disable these programs to improve the speed of your device.
6. Turn Off Suggestions From Windows

As you keep using your Windows 10 PC, the device slowly learns about your preferences and gives you suggestions regarding what you would like and might want to do with the operating system. This can make your PC lag and run quite sluggishly. To disable suggestions, click on the Start button and then select the Settings icon. From there, proceed to go to System and click on the Notifications & actions tab. Now, uncheck the box that is marked ‘Get tips, tricks, and suggestions as you use Windows. This will block all notifications from suggestions too.
- Also Read About: How To Enable TPM and Secure Boot In Windows 10
7. Run Troubleshooters
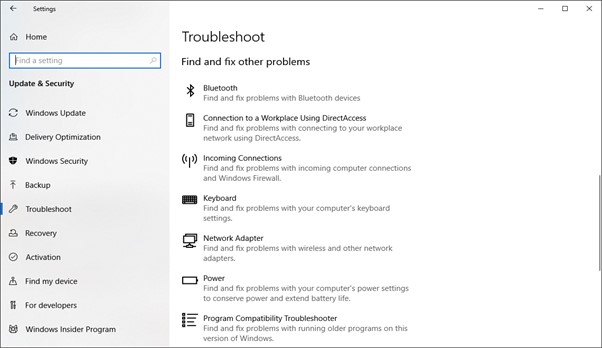
Search ‘Troubleshoot’ from the Search tab in the Start menu. Windows automatically suggests troubleshooting utilities you should run. You can opt to choose to run these utilities manually too or wait until the next scheduled troubleshooting run is done by the operating system.
- Go to the Control Panel’s System and visit Security.
- This will redirect you to the Security and Maintenance page.
- Here, you should click on Maintenance, and then press Start Maintenance.
This ought to speed up your slow Windows 10 PC but in the rare chance it does not, you can take a look at the other methods in this list.
8. Increase Your RAM Memory
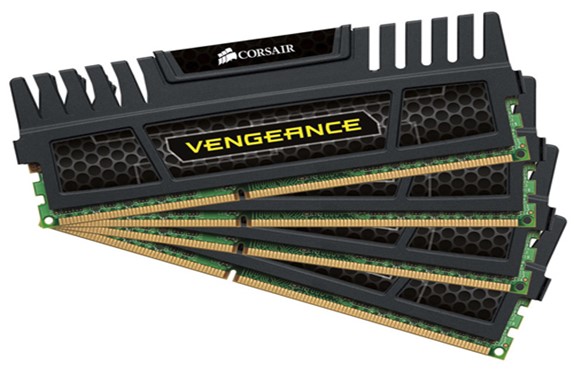
Windows 10 is quite renowned for being efficient when it comes to memory. We know that computers load data into their RAM for speedy access. In some Microsoft devices, adding RAM is not an option. However, the general trend is that business laptops and gaming devices will allow RAM upgrades. One good option you can opt for is the 8GB high-performance DDR4 RAM. By a general rule of thumb, a RAM upgrade is one good way to make your PC more powerful. This holds especially true in devices that are old and do not have enough RAM. In combination with adding more memory, you can also optimize your PC with a dedicated performance booster.
- Also Read About: How To Fix Windows 10 Endless Reboot Loop
9. Stop OneDrive From Syncing

Microsoft OneDrive is a file hosting service that is operated by Microsoft. It enables registered users to share and synchronize their files by keeping them synced and up to date on all your Windows devices. This obviously consumes a lot of memory and slows down your computer. You can turn off OneDrive synching temporarily to improve PC speed. To do this, right-click the OneDrive icon present on the taskbar.
- Click on the More button at the bottom of the screen.
- Click on Pause Syncing and toggle between 2 hours, 8 hours, or 24 hours, depending upon how long you want to halt this feature from operating.
If you want to turn off syncing permanently, right-click the OneDrive icon, and from the popup menu, select Settings. From there, go to Account. Click on the option to unlink your PC and then proceed to unlink your account too.
10. Turn Off The Search Indexing Feature
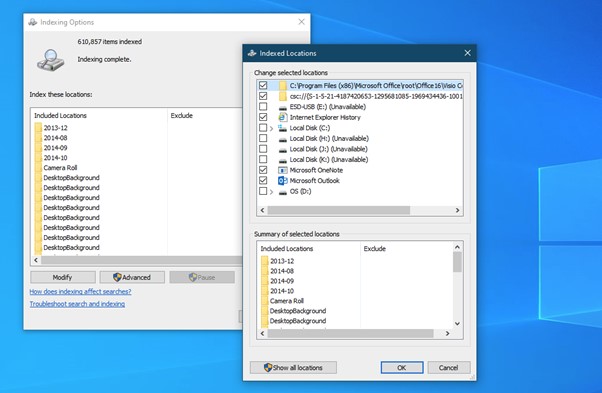
Search Indexing is not a major culprit when it comes to slowing down your device. However, occasionally, when you require an additional speed boost, you can turn this off. To turn off indexing, you need to follow some steps. First, open the Indexing Options control panel by typing in Index in the Start search menu. In the control panel window displayed to you, click on Modify and uncheck the locations that you would rather not have indexed. This can easily be done by selecting the Advanced mode. Another way to go about this is to go to the right-hand panel on your screen and click on More options. After this is done, press the Stop button.
- Also Read About: How To Take Screenshot On Windows 11
11. Disable All Special Effects And Animations
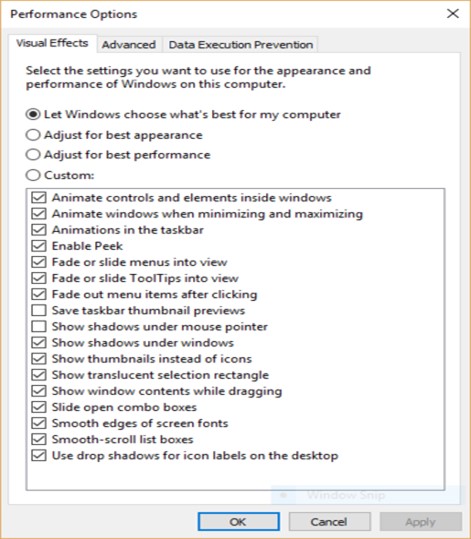
This method is rather obvious. To give users the complete Windows 10 experience, Microsoft deploys the use of several eye-catching visuals, effects, and animations. If all you care about is enhanced system performance, you can turn off these features on your Windows 10 PC.
- In the search box on the bottom of your screen, type sysdm.cpl and press the Enter key on your keyboard.
- This will immediately launch the System Properties dialog box.
- Navigate to the Advanced tab and click on the Settings option under the Performance tab.
Once the Performance Options dialog box opens up, you will be able to see a varied list of animations and special effects. You can turn these off as per your wish.
Final Words
Try out these methods listed above to solve your system speed issues. As a last resort, you can also try restarting your Windows 10 PC and you will immediately notice an uptick in the performance of your device. As we said above, you can also use third-party apps like CCleaner, IOBit Advanced SystemCare, etc. to further boost your device’s performance.
We will keep this post updated with more methods to boost Windows 10 performance and speed, so keep visiting Hipop Eration to know about them. If you are facing any issues in following any methods mentioned above, or you know about any other working way to increase Windows 10 performance, then do let us know about it too so we can include that in this post.
